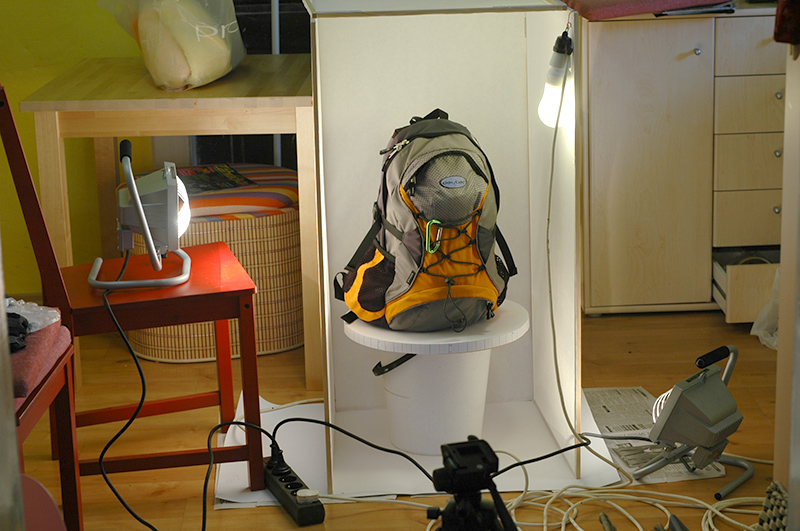
How to photograph a product for 360 degree product photography
1. Lighting
For the best results you need good lighting. External flash units (or strong halogen lights) in connection with a light-tent (or solid background) are a must for achieving the best results.
2. Turntable
Depending on your budget, you can buy (an expensive) motorized turntable that connects with your camera and computer and does the rotation, the shutter release and the file download automatically.
If you are low on budget, or just want to try out the 360° product photography, you can buya IKEA SNUDD Lazy Susan turntable and cover it with white sheet of paper.
This is what I have actually done for the shots of the Deuter Backpack few years ago:

3. Camera
Good lighting & scene setup (solid color background) are more important than a camera. Nowadays, even 5 years old digital cameras have enough megapixels for a 360° product view for your website. The very important camera feature is that you can lock the aperture, shutter speed and manual focus settings. You want to keep these settings the same for all shots in the full 360° turn of your product.
4. Photoshop / Photo Editing
You’ve put already great effort and time to shoot the product photos. Just one additionalstep is necessary to make the photos look perfect – cut out the background. This step is not necessary if your lightning & background setup was perfect and the background is good the way it is.
You can outsource this task to online services ( like clippingmagic.com or others).
5. Done!
Now when you have the photos ready, you can import them into the 360° Product View Creatorand export a 360° product view for your website!
Also don’t forget to backup your photos 🙂
note: with Cloud hosting, the product images are securely stored in our cloud